Showing posts with label Recipes. Show all posts

A festive guilt-free milkshake

Wednesday, 28 December 2016

"I never want to eat again. Ever" - this is me after every meal I have over Christmas. Of course, a few hours later I can be found indulging in more mince pies and knocking back the mulled wine. But that's okay because 'it's Christmas!'... 

Except, I won't be able to use that excuse anymore so in an attempt to make a transition to the healthy side, I whipped up this delicious cinnamon and vanilla milkshake, using Forever Lite Ultra* in vanilla flavour.


To make, simply add a level scoop of your forever lite powder to 300ml of semi-skimmed milk (by all means use skimmed to save on calories, but I'm not quite at that stage yet!). Then simply sprinkle in some cinnamon and give it a good ol' whisk to give it a nice creamy texture!

Sprinkle a little more cinnamon on the top, et voila!

If made with skimmed milk, that makes a grand total of 201 calories. Not bad for a tasty milkshake!!

I actually made this because I was scavenging the house looking for some Christmas leftovers as we're not having lunch till we've gone to the bank and some shops AND the garden centre, and I knew that if I didn't eat something, I'd end up eating more rubbish.

I was starving before I drank this and I can honestly say I now feel completely satisfied...and for me as the biggest eater for a little person you'll know, is saying something.


If you're really wanting to shed some pounds then you can take on the seven day challenge where you replace two of your meals with a shake! I think I'll play around with more recipes before attempting that because my love for food is just too great! And remember that if you do try the challenge then it should only be short-term..a sorta kick-start to your healthy lifestyle!

If you have any other recipes, I'd love to try them so do let me know :)


p.s. I now have a facebook page which you can find here


Cheesy Pesto Twirls

Saturday, 10 December 2016

I remember making cheese straws in nursery. That's the level of difficulty we're working with here...except these cheese straws have an extra sophisticated twist to them! Easy to make and a definite crowd pleaser, you can't not have these on your spread this Christmas.


All you need is:
  • an egg
  • two sheets of ready rolled puff pastry
  • grated mozzarella 
  • a jar of green pesto ( I bet red would work just as well though!
Step One: Preheat the oven to 180 degrees C.

Step Two: Line a baking tray with some foil and then roll out your first sheet of pastry.

Step Three: Spread a generous layer of pesto across the whole sheet and then sprinkle on your grated mozzarella. 

Step Four: Lie the second sheet of pastry on top so you have made a sandwich with it. Then cut into strips of around 4-5cm width and as long as you like! 

Step Five: Twist the strips and then rub some egg over the pastry so that they leave the oven with a nice glaze. Pop  them in the oven for 25 mins.

They taste best served warm straight from the oven!

p.s. I now have a facebook page which you can find here


The Most Delicious White Chocolate and Raspberry Cake

Monday, 28 November 2016


It was one of my friend's birthday recently so of course, this called for a cake. But not just any cake, this one had to be super duper extra special! I searched far and wide on the internet (slight exaggeration but you get me) until I stumbled upon this gem of a recipe on BBC Good Food. White Chocolate and Raspberry...I mean you just can't go wrong with such a classic combination.

Enough babbling, this is what you'll need to make it:

For the cake
200g Unsalted Butter 
100g White Chocolate
4 Large Eggs
200g Caster Sugar
200g Self-raising Flour
175g Raspberries

For the Ganache
200g White Chocolate
250ml Double Cream
A little bit of Icing Sugar

Method:

(1) Preheat the oven to 180C and then grease and line two standard size cake tins. Chop up the butter into small chunks along with the white chocolate and then let it melt over a bowl of boiling water.

(2) When the butter and chocolate have melted into a heavenly bliss, allow it to cool for a couple minutes, before beating in the eggs and sugar with a whisk. 

(3) Sift and fold in the flour and raspberries.

(4) Divide the mixture between the two cake tins and place in the centre of the oven for 20-25mins. 

(5) Once the cakes are ready, allow them to cool whilst you get started on the ganache!

(6) Chop up your remaining chocolate and add 100ml of double cream. Place them over a bowl of hot water and allow the chocolate to melt into the cream. Once it's melted, allow it to cool before adding the remainder of the cream.

(7) Whisk the mixture until it's light and fluffy. Once the cakes are cool, spread the ganache between the two cakes, making a sandwich. I had so much ganache that I also put some on the top, chucked on some spare raspberries and dusted on the icing sugar.

Et voila!!!


Banana, Blueberry and Cinnamon Pancakes

Tuesday, 12 July 2016


Every pancake day I wonder why we all don't eat pancakes more often? They're soooo easy to make and you can mix it up filling wise, whether you want sweet or savoury!

Some might argue they're not the healthiest option,...BUT what if I told you I have the solution for you?

Banana pancakes are made from food that's good for you and are gluten free - bye bye bloating!

To make these guilt-free pancakes you will need:

2 Bananas
1 Egg
Handful of Blueberries
Coconut Oil 
Cinnamon
Fat Free Plain Yogurt (optional)

(1) Chop up your bananas and mash them up till they're as smooth as possible

(2) Crack in your egg and mix it in till the mixture in nice and smooth with minimal lumps and then sprinkle in as much cinnamon as you like 

(3) Heat your oil in a frying pan and put a ladel full of mixture to fry - as you would a normal pancake. I find the thicker and smaller ones are easier to keep in pancake shape!

(4) Fry for a couple minutes then attempt to flip it without making a mess (little tricky with these, not going to lie to you!)

(5) Once they look cooked, serve with yogurt and a good handful of blueberries :)


This recipe will make about 3 small pancakes or 2 big ones so basically enough for one!!!

Enjoy xx

Lazy One Pan Mexican Brunch

Sunday, 1 May 2016


Sundays are made for brunching, but this can get pricey if you always eat out. I decided to throw a few delicious ingredients into a pan and make up my own! It's perfect for those of you who hate washing up (does anyone not hate it?) and you can use up pretty much anything in your cupboards.

My concoction requires the following ingredients (serves 2 very hungry people):

1 sliced red pepper
1/4 of a chorizo chopped
Tomato puree
1 tin of chopped tomatoes
1 tin of chickpeas, drained
1 tsp honey
Spices (I used cumin and piri piri spice)
Mixed herbs
1 chopped red chilli
2 eggs
Grated cheddar


1. To start, heat some olive oil in a pan and fry your red peppers till they're soft and have a slight charcoaled edge to them. Then add your chopped chorizo and fry for about 2-3mins.

2. Add a squeeze of tomato puree and then chopped tomatoes, before mixing in all of your chosen spices and chopped chilli. Just use as much as you want, but I think this dish works well with lots of heat!!

3. Chuck in the chickpeas and then stir in the honey for a bit of extra sweetness then leave to simmer for 3 minutes.

4. Part the mixture and crack in a couple eggs and then cook for a further 5 minutes or until the eggs are cooked.

5. Sprinkle on the grated cheese and serve straight from the pan with some warm crusty bread for dipping!!!  I bet toasted tortillas would also work well here.

ENJOY!!! :)


If you're a big brunch fan then why not try my cheesy bacon and egg breakfast cups?

p.s. I now have a facebook page which you can find here


Chunky Chocolate Jazz Cakeies

Tuesday, 12 April 2016


I'm going to hold my hands up now and admit that these did not turn out how I wanted them to, They were supposed to be, well you know...normal flat cookie shape. They were an accidental tasty mistake so I thought I'd share exactly how to make these scrummy little chunks of goodness! They're texture is between a cookie and a cake, so we're going to call them cakeies!

You Will Need:
125g softened butter ( I used clover light which is maybe why they went like this)
100g brown soft sugar
1 medium egg, lightly beaten
225g Self-raising flour
2 splashes of milk
As much chocolate as you want, I used broken up easter egg
Lots of Jazzies!!!

Method:
1. Preheat the oven to 180°C
2. Cream the butter and sugar together, before mixing in the egg
3. Sift in the flour and mix well to form a dough, adding the 2 splashes of milk to help it all stick together
4. Break up your chocolate and Jazzies and distribute them through the dough. I'd give you a precise measurement but lets face it, you're probably going to eat half of it anyway

5. Roll the dough into walnut sized ball and place on a grease-proof paper covered baking tray and bake for around 10 mins, until the tops turn golden

Enjoy!!! Send me photos if you make some :)


p.s. I now have a facebook page which you can find here


Pink Passion Cocktail

Monday, 15 February 2016

Ever since I got some rather fancy looking martini glasses for my birthday, having a cocktail or two or three is no longer a rare thing in my house. That's why when Corky's asked if I'd like to make my own cocktail recipe using their raspberry glitter schapps*, I jumped at the chance. 

I've only every experienced Corky's from a shot glass so it was quite fun experimenting with different flavours for a cocktail...any excuse for a drink ey!! 

Here's the concoction I liked the best. You should try it - it's berry nice ;)


You will need:

A couple handfuls of fresh raspberries 
1 Lime
50ml Corky's Raspberry Glitter Schnapps
100ml Raspberry and Cranberry Juice 
Soda water 
Lots and lots of ice cubes
Enough caster sugar and Grenadine to decorate the rim of your glass


I started off decorating my glasses by pouring some grenadine into a plate and then caster sugar in another plate. Slowly dip your glass into the grenadine and then into the sugar for a pretty frosted pink edge. 

Next, I madepurée by blending the raspberries (remember to leave a couple out for decorating) and then putting them through a sieve - no one wants to be picking seeds out of their teeth!

Add the juice of half a lime, 50ml of Corky's Raspberry Glitter, 100ml of Cranberry and Raspberry juice, your 'lots and lots of ice cubes' and give it all a good shake..


Pour carefully into your frosted edge glass, top with soda water and pop a raspberry and wedge of lime on the rim for good measure.

And you're all done!!!

My mum decided to top hers with Champagne which worked really well too :)

I love the girliness of the glitter and think these would be perfect for a girl's night in or out!!

They also would be perfect for a hen party! Corky's are offering a very lucky somebody a Hen Party of their choice worth up to £1000. All you have to do is tell them which Corky's flavour you'd want at your hen party! Click here to enter

Good luck if you decide to enter and if you decide to try out my recipe, let me know what you think!

p.s. I now have a facebook page which you can find here


Cheesy bacon and egg breakfast cups

Wednesday, 20 January 2016

You wake up and you're not sure you can sit up because your head is spinning and you fear you might just be sick if you move. Your mouth is dry and you have no idea what happened last night and keep finding unexplained bruises. You're hungover.You're hungry, you're thirsty and basically you want bacon. In fact, what you really want is cheesy bacon and egg breakfast cups which are oh so easy to make and will settle the bacon monster than lives within.... so lets get started!


You will need bread, grated cheese, eggs, bacon and black pepper....A glass of water will help you get through this too...
A glass/mug/something round that you can cut with and a baking tray with wells in

Preheat the oven to 200 degrees Celsius and then grab a glass to cut the bread into circles that will fit into the bottom of the baking tray wells.


Cook your bacon however you like it - I grilled mine - and then cut it into slices to make a boarder around the bread.


Next add a layer of cheese...


Crack an egg on top...

Sprinkle on some black pepper and pop them in the oven for 15 minutes....it really is that easy!!!

I didn't set a timer and found the yolks had just gone hard so I'd try 12 minutes if you like your yolks runny.


And voila!!!! Really quick and super delicious.

I think you could play around and add all sorts to this recipe :) mushrooms, tomatoes, salmon? 

Let me know if you try these!!

p.s. I now have a facebook page which you can find here


Skinny Herb-crusted Pork with Apple Mash

Thursday, 2 April 2015

Since coming home from Uni, I've tried to eat a little healthier to avoid piling on too many of those inevitable Easter pounds! My mum has been doing Slimming World since September and looks amazing because of it! In a bid to support her new healthy lifestyle, I decided to cook for the family using a Slimming World recipe, and believe me, it may lack fat but it does not lack taste!!


For 4 people you will need:

1tbsp dried mixed herbs
80g of wholemeal bread (2 slices will do)
2 crushed garlic cloves
4 pork loin steaks
low calorie cookingg spray
salt and black pepper
1kg potatoes
2 red apples

Pssstt ...if you're following the Slimming World plan, then each serving is 4 syns on Extra Easy, 13 syns on Original and 18 syns on Green


 (For the Pork)
1. Preheat your oven to 200 degrees celsius/Gas mark 6
2. Toast your two slices of bread
3. Put the toasted bread, herbs and garlic cloves into a food processor to blend until crumb-like and then tip out onto a plate
4. Remove all visible fat from your pork loins, spray each side a few times with your low calorie spray and then push both sides onto the plate of breadcrumbs
5. Season and cook for 15-20 minutes


(For the Apple Mash)
1. Peel and roughly chop the potatoes into chunks
2. Cook for around 15 minutes in a pan of boiling salted water
3. Drain out the water and then return the potatoes into the pan
4. Grate the apples into the potatoes, season and then mash


You can serve this with vegetables of your choice! I went for curly Kale and Celeriac mmmm :)

Eating healthy does not mean you have to eat 'rabbit food'


White Chocolate and Cranberry Cookies (that taste like they're from Millie's!!)

Sunday, 8 February 2015

I absolutely love baking and I usually end up doing it on a Sunday afternoon. The end result can be hit or miss but this time it was definitely a hit!!

I didn't really know what to make, but wandered to Tesco for some inspiration..threw some white chocolate and cranberries into my basket (a classic combo) and skipped back home, in the hope I could actually find a recipe!

Bliss is what happened....


I adapted this recipe to make them and they genuinely do taste like they could be from Millie's!


Slightly cripsy on the outside and oh so moist in the middle....

(I hate the word moist too, but when it comes to cookies, it's necessary!)

The cranberries burst with sweetness in your mouth and if you eat them whilst they're warm, the white chocolate will be all melted and delicious..


I recommend eating them after they've slightly cooled but are still warm, along with a cold glass of milk!

To have a go yourself, you will need:

125g butter (leave it out the fridge so it softens)
225g of caster sugar
1 egg, beaten
1tsp vanilla extract
225g self raising flower
A pinch of salt
150g white chocolate
135g dried cranberries

1. Preheat the oven to 180 degrees

2. Cream the butter and sugar together and then add the beaten egg and vanilla extract

3. Sift in the flour (I actually don't have a sieve - student life! - but it worked fine without) and throw in that pinch of salt

4. Roughly chop up your white chocolate into chunks of whatever size you want and add that, along with your cranberries

5. Knead the mixture into a dough. If it's not sticking together then add a splash of milk

6. Roll the dough into balls, just slightly bigger than a walnut and place on a greased baking tray

7. Pop in the oven for about 10-12 minutes - when they come out they should still be soft, but will harden as they cool, yet remain soft in the centre

Enjoy! x

Melting Snowman Biscuits!

Sunday, 21 December 2014


After watching Zoella's Quick and Easy DIY Christmas Treats video, I decided to try and make my own melting snowman biscuits! I had fun accessorising some of mine with fondant icing hats and scarves!
They're very simple to do, really fun to decorate and super yummy to eat! There's something about the digestive and icing combo that reminds me of being little :)

All you need is :

- A pack of digestive biscuits
- Icing sugar
- Icing pens in whatever colours you like
- Big white marshmallows
- Fondant Icing (optional) or any other decorative bits you have!


First of all, add water to your icing sugar until it's a nice consistency - not too runny or your snowmen will be melting all down the table!

Spread the icing onto your digestive biscuit and then grab a white marshmallow (I just ate all the pinks ones)  and plonk it on top of the icing before it dries.


Leave them to dry a little, maybe 5-10 minutes and brace yourself for the fun part!


There's not really a right or wrong way of decorating your snowmen. Be creative and experiment with different expressions and colours!! Half way through I decided to make little hats and scarves with some fondant icing that was leftover from the Christmas Cake!


These biscuits are perfect to quickly make before your friends come over! My friend is actually on her way over now! 

Remember to serve with tea and enjoy!!


Aren't they just the cutest?!!


Chocolate Heaven

Friday, 21 November 2014


It was my friend's birthday yesterday so me and a friend decided to make her a surprise birthday cake! We used my cheeky chocolate fudge cake recipe and decided to give it a bit of a makeover.

We used chocolate fingers to go around the edge of the cake and then to divide it into six parts. Two are filled with malteasers, two with skittles and two with chocolate crunchy balls. 

It was so easy to do yet really effective and I think you could have fun using all kinds of sweets for this :)


If anyone has done a similar style cake, please send me links! :)

A Healthy Winter Warmer

Saturday, 15 November 2014


When I was little, I'd refuse to eat any soup unless it was made by my Great Granny Brennan, who lived in Scotland. My mum used to tell me that my Great Gran had sent soup in the post for us, just so that I'd eat whatever my mum had actually made! I genuinely believed her for years and actually felt a bit deceived when the truth came out!

With the colder months upon us, I decided to try and recreate the same soup as my great gran to keep me warm after a hard day at uni! You will need:

4 small-medium potatoes
3 large carrots
3 small onions
chicken stock
tomato puree
olive oil
ground black pepper and salt for seasoning

1. Peel and wash all of your vegetables. Cut the onions into fine slices, the potatoes into small cubes and grate the carrots. (you could do small carrot cubes but grating was what my gran did!)

2. In a large pan, heat up a tablespoon of olive oil and slowly fry the onions until golden in colour. They'll start to smell sweet when they're ready

3. Add boiled water and chicken stock to the onions and make sure the stock properly dissolves in, before adding your carrot and potaotes

4. I added a touch of tomato puree to my soup, I think canned chopped tomatoes would also work well if you wanted to change things up a bit! I also added LOTS of ground black pepper and a pinch of salt

5. Leave the soup mixture to simmer for about 20 minutes. Check the potatoes are thoroughly cooked through before you take it off the heat!

6. I didn't blend my soup as I quite like it chunky, but if you prefer it smooth, then this is when you need to get your hand blender out!

7. Voila!! Simple and yummy, not to mention good for you!


Things that make you go mmm..

Sunday, 19 October 2014


I would like to introduce you to the Slutty Brownie.. if you haven't already stumbled across this oh so naughty but amazing mixture of baked goods heaven!!

 I wish I could claim to have created this masterpiece, but I didn't, so rather than a recipe, this is more of a heads up that you should head over to The Londoner's blog and get those oven gloves on.

Top Layer: Brownie
Middle Layer: Oreos
Bottom Layer: Cookies

I have started the gym again recently, which unfortunately has led me to believe I am now entitled  able to eat whatever I want....I definitely can't get away with it BUT a girl has got to treat herself sometimes! 

Cheeky Chocolate Fudge Cake!

Thursday, 28 August 2014

Mmmmm..


The girls were having a night in to catch up and I saw this as a perfect opportunity to make something naughty but nice to eat - I mean, what better excuse is there?!

Me and my friend Rachel searched the internet and decided on this chocolate cake! We already had most of the ingredients so decided to head to the shops and find some yummy treats to decorate the top!

Ingredients:

For the Chocolate Sponge:

175g Self Raising Flour
2 Tbsp Cocoa Powder
1 Tsp Bicarbonate of Soda
150g Caster Sugar
2 Egg Beaten
150ml Sunflower or Vegetable Oil
150ml Semi-skimmed Milk
2 Tbsp Golden Syrup

For the Coating and Filling:

75g Unsalted Butter
3 Tbsp Cocoa Powder
175g Icing Sugar
Splash of Milk


What to do:


  1. Turn the oven to 180 degrees Celsius
  2. Grease two sandwich tins and line with baking paper
  3. Sieve the flour, cocoa powder and bicarbonate of soda into a large bowl. Add the sugar and mix well
  4. Make a little well in the centre of the mixture and add the eggs, oil, golden syrup and milk. Then stir with an electric whisk until nice and smooth
  5. Divide the mixture between the two tins and bake for 25-30mins (during this time put the kettle on and have a cuppa :)!! )
  6. Once the cake has risen, take it out and leave to cool  


Now for the butter icing:

1. Beat the butter in a bowl until soft
2. Gradually sieve in the icing sugar and mix in along with the cocoa powder
3. Add a splash of milk and keep doing so until the mixture becomes spreadable
4. Once the sponge has cooled, spread the icing between the two layers to hold them together and then     smother all over the top
5. You can then add any extra toppings you want to decorate!! (the fun part!)

Tada!!!


Posh Cheesy Chips!

Saturday, 23 August 2014


Sweet Potato Chips with Melted Goats Cheese

Cheesy chips (and garlic sauce!) are usually how I choose to finish a tipsy night out but today I decided to try and create my own healthier version!

Sweet potatoes and Goats Cheese are two of my favourite foods and complement each other so well! These are really easy to make and are a good alternative snack to those you get in the chippy.

You will need:

  • Sweet potatoes (1 per person is about right but depends how hungry you are!)
  • Goats Cheese (again you can crumble on as much or as little as you want!)
  • 1 Calorie Olive Oil Spray
  • Salt and Pepper to season


Method:

1. Preheat your oven to 200 degrees Celsius

2. Peel and chop the sweet potatoes into chip like shapes - or you could even make wedges!

3. Put the sweet potato into an oven tray and spray a few sprays of olive oil so that all of them are covered

4. Season with salt and pepper to your liking


5. Put in the oven for 20-25mins (time to cook will depend on how thick your chips are)

6. Crumble the goats cheese over the top and then pop back in the oven till it has melted to your liking. I went for 10mins

7. Enjoy!!! :)

Blueberry and Greek Yoghurt Breakfast Muffins

Thursday, 21 August 2014

With the new Great British Bake Off series having recently started, I have been desperate to get back into baking again. I found this recipe from Donna Hay's website and just had to have a go myself. These blueberry muffins would be perfect as a 'grab and go' breakfast!

I managed to make 12 muffins from the recipe below, but I do like my muffins big!


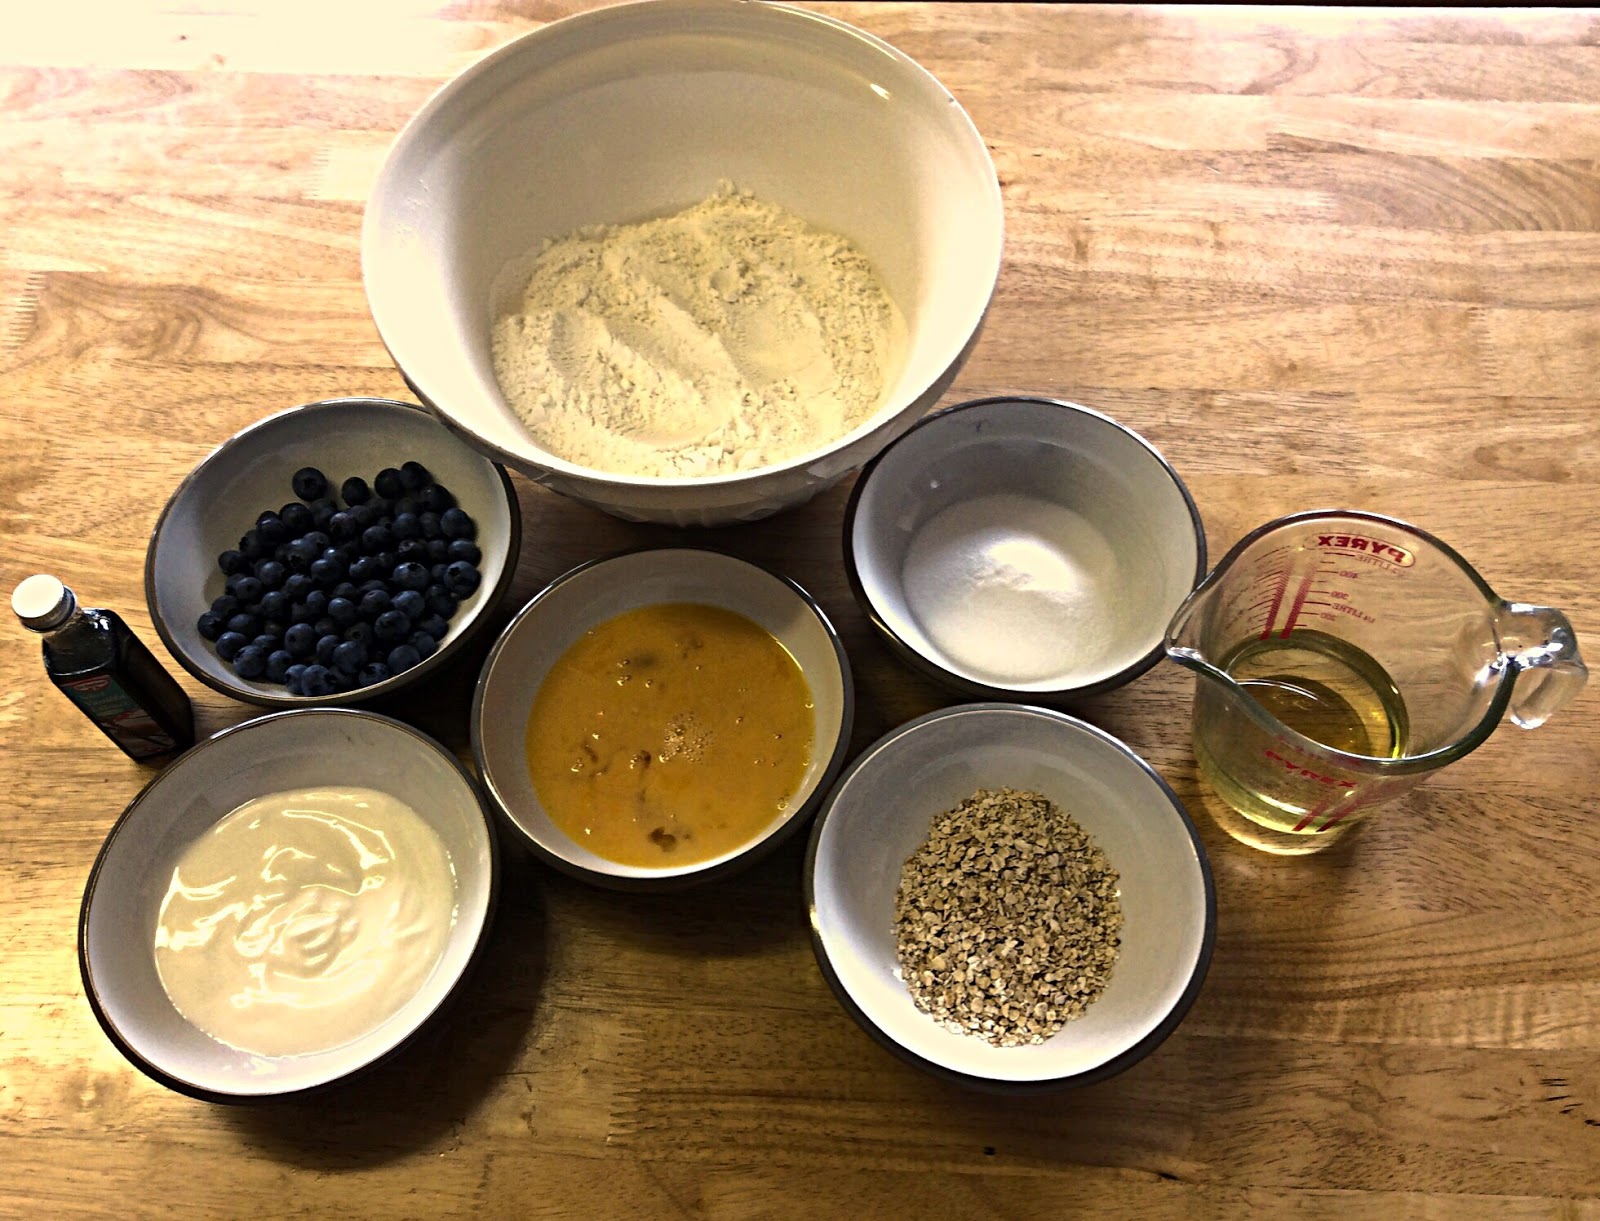
You will need:
  • 375g of Self Raising Flour (Sifted)
  • 110g of Caster Sugar (And a little extra to sprinkle the tops before baking)
  • 3 Beaten medium Eggs
  • 180ml of Vegetable Oil
  • 140g Low Fat Greek Style Yoghurt (note: does not have to be low fat)
  • 30g Rolled Oats (And a little extra for sprinkling)
  • 1tsp Vanilla Extract 
  • 150g of Blueberries (I used fresh ones but frozen will also work) 
  • A few extra blueberries to nibble on whilst the muffins are baking 

Ingredients

Method:
  1. Preheat the oven to 180 degrees Celsius
  2. Mix everything together in a big bowl ( I recommend adding the dry ingredients first, then your wet ingredients and finishing with the blueberries)
  3. Spoon the mixture into 12 muffin cases
  4. Sprinkle with Sugar and Rolled oats
  5. Pop in the oven and bake for 25-30 minutes or until golden brown

Ready to bake!


Bon Appétit!


Design by | SweetElectric